If you are a regular user of macOS, you might think that since Apple is known for its great level of product security, you don’t need the extra security that a VPN offers. So far, even if you use a macOS, certain websites may still be able to obtain your IP address, or your ISP may be able to keep an eye on your iOS and macOS browser activity. Neither of those things can be prevented by macOS, but the best macOS VPN can. Consequently, if you want to keep your online activity secure and safeguard your digital information, it’s a good idea to use a reliable and best price VPNs.
However, in some circumstances, you need to turn off the VPN on macOS to solve some of the issues as identified in this guide. Keep reading till the end to know about these circumstances along with different methods to turn off the VPN on MacBook Air, MacBook Pro, Mac Studio, and other macOS devices.
Best Suggested VPNs For Your macOS Devices
- SurfShark: Compatible with Big Sur, Catalina, Monterey @ [Surfshark_Price]
- NordVPN: Improve your macOS Security @ [NordVPN_Price]
- PureVPN: Best for all macOS Versions @ [PureVPN_Price]
- CyberGhost: Compatible with any Version above High Sierra (10.13) [CyberGhost_Price]
- iProVPN: With Multiple VPN Protocols @ $1.30/month
Why I Need to Disable a VPN On macOS?
In terms of digital security and privacy, there’s no reason to turn off your VPN except, you may need to disable it in some most common situations. For instance, your VPN slows down your Internet connection or when configuring your Windows computer’s Internet connection.
However, there can be other specific situations as well when you need to turn off your VPN. The good news is that it’s not too hard to do. Some of the most common reasons you might want to learn how to turn off a VPN service on macOS devices are listed below:
- You need to troubleshoot a problem with your network
- Accessing local sharing folder or printer on your workspace
- Using a local mailbox server
- Visiting a country where VPN is banned or illegal, like China.
- You need to access the local municipal website which is only available in your country
- You’re running out of battery on your laptop and don’t have a charging facility nearby.
- You’re unable to access some sites over a VPN
Step-by-Step Guide To Turn Off VPN On macOS
There are basically three ways by which you can turn off VPN on Mac in minimum time. These procedures are:
- Disconnect VPN via its dedicated app.
- Turn off VPN using Network Configuration Box.
- Quick disconnect from the menu bar.
Method 1: Disconnect VPN Via It’s Dedicated App
The first method is to deactivate the VPN from its application by following these steps:
- Open the VPN app from Home Screen.
- Press Turn Off or Disconnect Button as a provider by your VPN Service. Following is a screenshot from the ExpressVPN app.
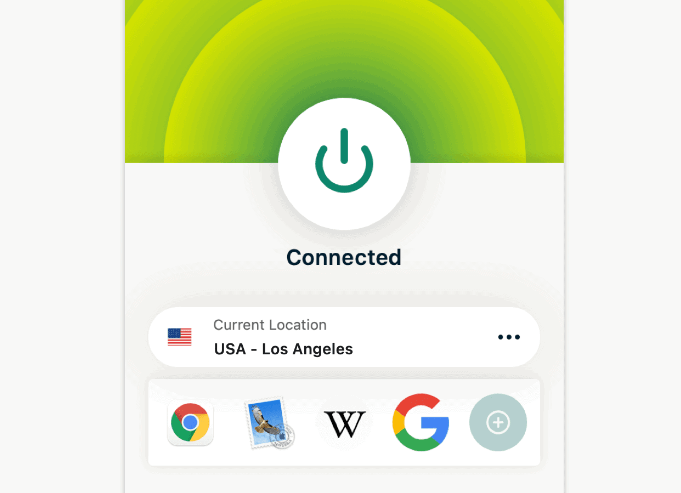
3. You’re done!
Method 2: Turn Off VPN Using Network Configuration Box
If you have configured your VPN via an Operating system and not an app, then you can turn it off through the configurations window by following these steps:
- Click the Apple icon in the top left of the desktop and Click System Preferences.
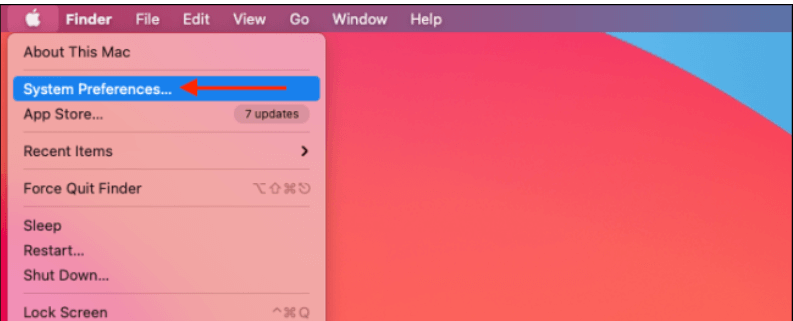
2. Now Select Network.
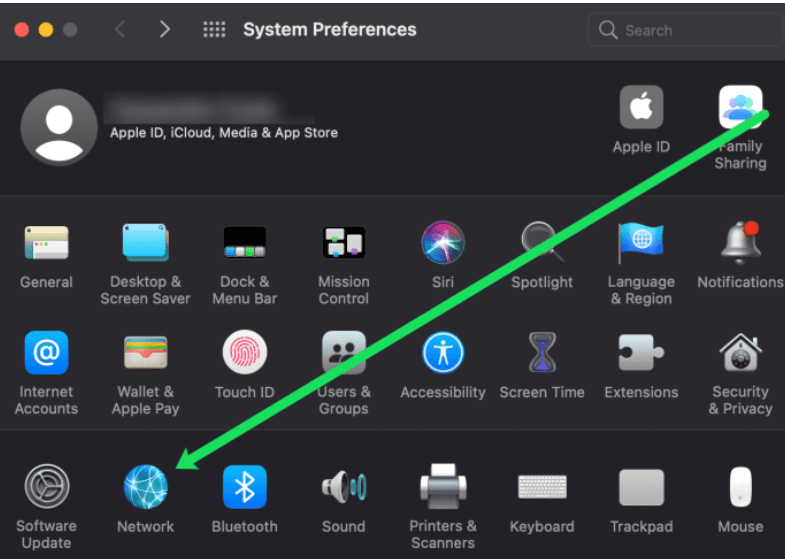
3. From the left panel of the network window, click on the VPN name/protocol which you want to disconnect.
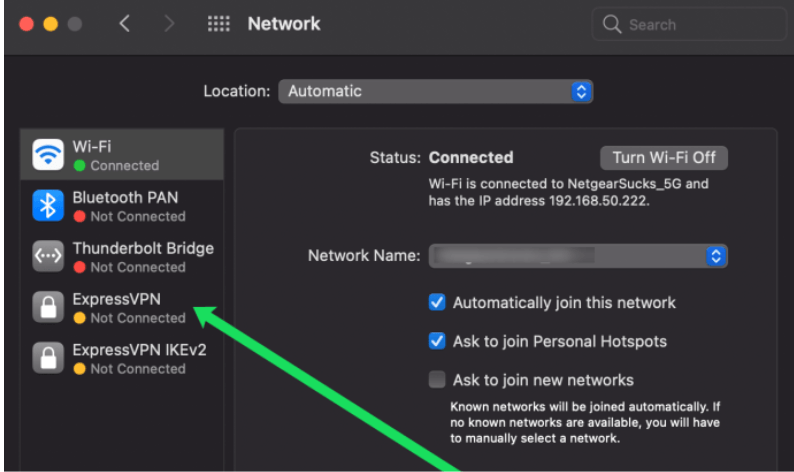
4. Select Disconnect.
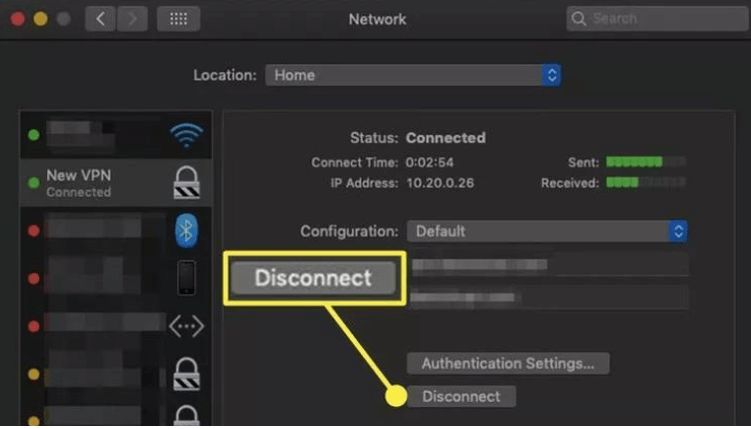
5. That’s it! You are now disconnected from the VPN Server and can access the website directly from your ISP.
Method 3: Quick Disconnect From Menu Bar
This is the quickest way to turn off VPN on macOS devices. You just have to follow these two steps:
- Click on the VPN icon from the menu bar.

2. Select Disconnect [VPN name].
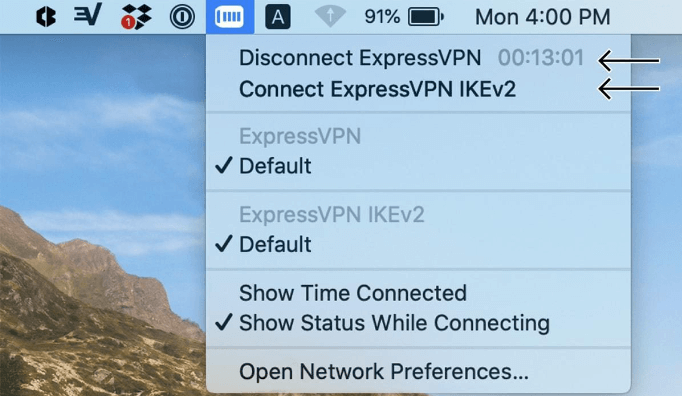
Note: To have this option in your menu bar, you must have enabled it from VPN List in the Network menu.
The Bottom Line
You must choose a VPN that ensures faster speeds and complete protection if you want to keep your online transactions and personal information secure. No matter how good the VPN is, you will occasionally need to turn it off. We have tried to cover each of the circumstances in which you need to turn off your VPN along with different methods for macOS devices such as MacBook Air, MacBook Pro, iMac, Mac mini, Mac Studio, Mac Pro, and so on.


